Search This Blog

Monday, April 25, 2011

Tiramisu - A Twist on the Classical

Tiramisu conjures images of sitting outside an Italian bakery, savoring the creamy yumminess of this dessert while enjoying the Italian scenery.  I decided very last minute - literally IN the grocery store - to make this dessert for our Easter Family Luncheon.  INSIDE the grocery store meant I was going off the top of my head to recall possible needed items to make this dish.  I knew I had a package of Lady Finger cookies in the pantry.  Coffee - check (ALWAYS at home!).  Picked up some Whipping Cream.  Thought - let's make this an EASY dessert to make - grabbed a large box of Vanilla Pudding mix.  Could NOT for the life of me find Marscapone Cheese - even with asking for directions from the employees, still could not.  And if you happened to be in the chaos of grocery shopping on Saturday - THE DAY BEFORE EASTER - you can understand why I just threw in the towel, grabbing a block of Cream Cheese
Having checked my plan with several versions of Tiramisu, I forged ahead.  And the end result was SO GOOD!

Tiramisu - a Twist on the Classic
Ingredients:
2 cups whipping cream
1/4 cup sugar
2 Tbsp Vanilla
1/2 cup STRONG brewed coffee (instant is fine)
2 Tbsp Kahlua (can be omitted)
16 oz cream cheese
large box of Vanilla Pudding mix (sugar free is fine)
1 Package Lady Finger Cookies
Cocoa Powder for dusting

1 - In mixer, pour whipping cream.  Add sugar.  Beginning on low, start whipping the cream.  Beat till whipped.  Add vanilla pudding mix.  Add cream cheese in small portions.  Blend well.  Set aside.
2 - Combine coffee and Kahlua.  Pour into a shallow dish for dipping Lady Finger cookies.
3 - Dip cookies 2 at a time in coffee.  Leave cookies on each side in the coffee for about 30 seconds to 1 minute.  They absorb the liquid quickly. Only do 1/2 at this time.  Line the bottom of an 8X8 dish with the cookies.
4 - Top with 1/2 of the cream cheese mixture.  Save other 1/2 for next layer.
5 - Dip the rest of the cookies in coffee, layering on top of the cream cheese mixture.
6 - Dust with cocoa powder if you would like.
Enjoy!
6 - Top with rest of cream cheese mixture.

Shared over at Mouthwatering Mondays, Mangia Mondays

Sunday, April 24, 2011

Do you feel lucky???? Check out these giveaways!

There are so many awesome blogs that have even more awesome giveaways (can you tell I have my 4 year old stuck in my head at the moment!).  I just have to share some of them.  Go check them, enter, and if you win, come back and tell me!

The Gone with a Handsomer Man Stonegable Giveaway over at StoneGable.
 * a copy of Michael Lee West's Gone with a Handsomer Man
 *a $100 Horchow Gift Certificate
 *a set of American Atelier Stoneware Dinnerware
 How AWESEOME!  (ok, I'll try to stop saying that word!)

Over at MommyMandy, check out the Cooking With Coke "Giveaway"
For a chance to win a Coco-Cola oven mitt and the Ingrid Hoffman  12 qt Tamale Pot and Steamer with Lid by T-fal.

Deviled Eggs - easy side dish for any potluck

 
Deviled Eggs are one of those side dishes I often forget.  If you have an hour to prepare something (or less, just need some time for the eggs to cool), this is a crowd pleasing delight!  And so easy!  Got to love that combination!
If you don't have an egg platter, no worries.  A shallow baking dish will work or a pie dish.  You just need something with a slight "lip" around the egg so these little buggers don't go slipping and sliding off your plate!
Deviled Eggs
6 Hard Boiled Eggs (need to know how to make the perfect hard boiled eggs?  CLICK HERE)
1/3 cup Mayonnaise
1 Tsp Mustard
2 TBS Sweet Pickle Relish
Paprika for a dash of color on top

Note - I typically try to plan ahead, hard boiling my eggs several hours ahead of time to allow them to cool a bit on the stove top then in the fridge.  I will admit, I have been rushed before and Iced those eggs down to spend up the cooling process.  I was stilling juggling warm and a bit steaming eggs.  Makes for some HOT cracking!


1 - Crack and Peel hard boiled eggs.  My eggshells go to our wonderful compost area.  The plants love them!
2 - Cut each egg in half with a sharp knife.  You want a "clean" cut.
3 - Empty the yolk of each half into a medium size bowl.  Set empty cooked whites aside.
4 - Smash the yolks a bit with a fork till yolks are broken into small fluffy pieces.
5 - Add mayo and pickle relish.
6 - Mix together, breaking apart any more lumps of yolk.  Blend till smooth.
7 - Using a table spoon, fill egg cooked white shell with the yolk mixture.  I typically have a small bit of mixture leftover.
8 - Sprinkle a touch of Paprika over the filled eggs.
Enjoy!
 

Posted by Picasa


Saturday, April 23, 2011

Baked Banana Oatmeal - almost Too Sinful to be called Breakfast!


Baked Banana Oatmeal - I spied this recipe at Kath Eats Real Food.  Confession time - I LOVE oatmeal for breakfast.  Period.  I used to eat Instant Oatmeal and was happy.  But I didn't know any better, I had not experienced the wonderful goodness of Old-Fashioned Oatmeal.  Oh My - I just savor the creamy goodness!  I LOVE bananas as well.  So the combination of Oatmeal and Bananas - had to be a winner!  And it was!  The smell alone was delicious!
Note - I used Steel Cut oats only because I had them, needing to be used.  Had bought them to try out, just wasn't Wow'd.  I really like my Old Fashioned Oats so much!  BUT with that being said, this recipe made the Steel Cut Oats SO YUMMY!

Banana Baked Oatmeal
Ingredients:
2 Bananas sliced
2 cups Old Fashioned Oats (I use Steel Cut in the pics)
1 tsp baking powder
1/2 tsp salt
1 egg
2 Bananas - mashed
1 tsp vanilla
1/2 cup brown sugar, plus 1 TBSP
1 1/2 cup skim milk


1 - Preheat oven to 375 degrees.  Place parchment paper inside 8X8 baking dish.
2 - Place sliced bananas over bottom of parchment paper.
3 - Mix together oatmeal, brown sugar (less 1 TBSP), salt, and baking powder.  Set aside.
4 - Beat egg.  Add mashed bananas, milk and vanilla.
5 - Add dry ingredients to wet mixture.
6 - Pour over banana slices. 

7- Bake in preheated oven for 30 minutes.  After 30 minutes, sprinkle extra brown sugar over oatmeal.  Bake another 12 minutes.
8 - Remove from baking dish and allow to cool for 5 - 10 minutes.
Serve alone or with milk poured over.
Enjoy!
Shared at Melt in Your Mouth Monday

Posted by Picasa

Friday, April 22, 2011

Cubed Beef Steak in Wine Gravy - Yum Yum Yum!!!

This was a first for both Big Guy and I - neither of us had ever cooked, nor eaten cubed steak.  I know, deprived childhoods!  LOL!  With the 1/4 of a cow we recently purchased, we now have in our freezer several different cuts of beef - Cubed Steak being one of them.  Cubed Steak is an inexpensive cut of beef that can be tough to chew if not cooked slow and tender.  This recipe was so easy to make and AMAZING to my taste buds!  Definitely TWO THUMBS WAY UP!
Cubed Beef Steak in Wine Gravy
4 cubed steaks (our package weighed about 1.5 pounds)
4 tbsp All Purpose Flour
2 tbsp Garlic Salt, divided
2 tbsp oregano, divided
2 tbsp extra virgin olive oil
1 1/4 cup water
1 packet dry gravy mix
1/3 cup red wine (I used a Pinot Noir that we didn't really care for - though we had bought 4 bottles of it!)
1 green pepper cut into 1 inch pieces
2 tablespoons butter
2 cups fresh white mushrooms, sliced

1 -In a large skillet, melt butter over medium heat.  Add sliced mushrooms with 1 tbsp garlic salt and 1 tbsp oregano.  Saute till golden.  Remove from pan, set aside for later.
2 - Mix flour, garlic salt, oregano in a plate.
3 - Dredge beef through flour mixture, coating each side.
4 - Heat oil in skillet over Medium heat.  Add coated beef into skillet, browning on each side for about 5 minutes (each side).
5 - In measuring cup, mix together dry gravy mix and water.  Pour over beef.
6 - Add wine, green pepper, and mushrooms.
7 - Simmer over low heat (or high simmer if you have that feature) for 25-30 minutes.

Serve with Rice or Mashed Potatoes!  Enjoy!

Shared at EKat's Kitchen: Friday Potluck
grab the code!

Pork and Sweet Potatoes - What a meal!

A meal my Mother in Law would enjoy! Those were the words the Big Guy spoke as he enjoyed this meal of Pork Chops cooked with cranberries, sweet potatoes, and apples.  It was amazingly tasty!  The combination of apples, sweet potatoes, and apples were fabulous.  The pork chops were so tender.  YUM!!!
Adapted from Taste of Home's website
Pork and Sweet Potatoes
Ingredients:
2 pound pork tenderloin (this is average size in the double package), cut into 15 slices
1/2 cup all purpose flour
1/2 tsp garlic salt
1/4 tsp ground pepper
1 tablespoon extra virgin olive oil
2 cups chicken broth
2 medium sweet potatoes, peeled and cubed
1/2 cup dried cranberries
1 Tablespoon Dijon Mustard
1 medium apple (I had a Fuji on hand)
1 small onion chopped

1 - Flatten pork slices to 1-1 1/2 inch thickness.  To do this, simply place pork slices in a Ziploc bag, grab a soup can, and get out your frustrations!
2 - In another resealable bag, mix together flour, salt, and pepper. Drop pork one at a time into flour mixture to coat.
3 - Add oil to a large non-stick pan.  Heat to medium heat.  Brown pork slices on each side, cooking about 5 minutes per side.
4 - Remove pork from pan.  Add chicken broth, sweet potato cubes, onion, and cranberries to skillet.Bring to a boil.  Reduce heat and cook for about 10 minutes.  Cook till sweet potatoes are tender.  Add mustard.  Mix together well.
5 - Return pork back to the pan.  Cook together for another 8-10 minutes.
Enjoy!

This made a double portion for our family - 5 mouths eating.  I froze the second portion, reheated for a fast meal one evening!  Worked great!

Shared at Miz Helen's Full Plate Thursday, The Saturday Evening Pot -make a food-e-friend- monday

Wednesday, April 13, 2011

Luscious Lemon Bars - Perfect Treat for a Tea

Need a treat for a coffee date or afternoon tea?  These are a compliment to either.  Super easy to whip up and quite delicious!  I needed something to serve to a group of ladies one morning.  I pulled this recipe, found I had all the ingredients on hand (most are basic pantry items) and in no time had these bars cooling on a rack.  Really super easy - I had the crust baking, missed the lemon topping all while preparing breakfast for my crew and baking blueberry muffins!  And my SuperWoman cape was in the laundry that morning *wink*!
Luscious Lemon Bars (as found in the USA Weekend March 25-27, 2011)
For Crust:
1 cup all-purpose flour
1/8 tsp salt
1/2 cup Powdered Sugar
1 stick (8 Tbs) butter, melted but not hot

For Filling:
2 Large Eggs
3/4 cup sugar (I used 1/2 only to reduce the sugar content a tad)
1 1/2 Tbs all-purpose flour
6 Tbs juice from 2 lemons
2 tsps finely grated lemon zest

Adjust oven rack to lower-middles position, preheat oven to 325 degrees.
Spray an 8X8 in baking dish with cooking spray.  Fit a sheet of heavy duty aluminum foil (I used reg as that was on hand) inside baking dish with an overlap for a "handle".  This will be lift the bars out to cool.  Spray the foil with cooking spray.  Make sure the bottom of the foil covers up all sides about 2 inches.
Mix together flour, salt, powdered sugar in a medium bowl.  Stir in butter to form dough.  Press the dough into the bottom of the pan.  Use your hands (or the bottom of a measuring cup dipped in flour is suggested).  Bake until pale golden, about 20 minutes.
While crust is baking, whisk together eggs, sugar, flour, lemon juice and zest in a medium bowl.
Remove crust from oven.  Pour lemon mixture over baked crust.  Place back into oven, bake for an additional 20 minutes until the filling is "set".  Let cool for about 20 minutes.
Using the over-hanging foil as handles, carefully lift the bars from the pan and cool on a wire rack.  Once room temperature, dust with powdered sugar.
To dust with powdered sugar, simply pour a small amount of powdered sugar (about 1/4 cup) into a small mesh strainer.  Lightly tap the strainer while moving it over the lemon bars.
Once completely cooled, cut into squares.
Yields 16 bars.
Enjoy!

Shared at Full Plate Thursday at Miz Helen's Country Cottage, Seasonal Saturday, and Sweets for a Saturday

Tuesday, April 12, 2011

Simple Eggs in a Nest Cupcakes


So easy and So cute!  These cupcakes were a cinch to put together with adorable results.  One of my preschoolers had an Easter party at playschool.  I grabbed the opportunity to make these darling little cupcakes.
Bake cupcakes either from scratch or a good 'ole store bought mix.  Allow to cool, then spread on icing.  My favorite icing is a simple Cream Cheese icing - softened cream cheese, powdered sugar (quite a bit), a little butter and LOTS of mixing power!
With the cupcakes newly iced (still need the icing "sticky" for "grass" to stay in place), add grass and top with "egg".

Items needed:
coconut
green food dye (yellow and blue make green - it's what I did)
Pastel colored Egg shaped M&M's (they are out in stores around Easter time)

I used approximately 3/4 cup of dyed coconut for 20 cupcakes.

Tint coconut the perfect green grass color to your liking.
After frosting, carefully make a small "nest" of green tinted coconut, lightly pushing the coconut into the icing.  This helps it to stay in place.
Grab a Pastel Egg shaped M&M (regular shaped Pastel ones would work if needed).  Press the Egg into the grass.
Surprise a 4 year old with a super cool cupcake!
Enjoy!

Wednesday, April 6, 2011

Asian Stuffed Cabbage Rolls

A little taste of Asia in these Cabbage Rolls made for a healthy and easy dinner.  The cabbage served as a wrap that "steamed" cooked the meat mixture.  Also made for an easy way to eat the roll as a finger food.  The hint of "kick" from the red pepper flakes gave just enough heat for a good taste in the meat without needing extra beverage.  This recipe made 14 rolls using 1 pound of lean ground beef.  With two adults and two preschoolers eating, we had 1/2 left over.  The extra rolls are stored in the freezer for a future dinner or lunch.
Served with steamed carrots and a mixed greens salad dressed with oil and vinegar, topped with dried cranberries, roasted almonds, and Roquefort cheese crumbles

Asian Stuffed Cabbage Rolls (adapted from Body + Soul magazine)

1 pound lean (93%) ground beef or turkey
4 oz mushrooms, coursely chopped
1/2 cup cooked brown rice
4 garlic cloves, minced
1 tablespoon finely grated fresh ginger
4 tablespoons thinly sliced scallions
2 tablespoons Soy sauce
2 tablespoon Toasted Sesame  oil
1/8 to 1/4 teaspoon red pepper flakes (depending on the amount of heat you desire)
14 cabbage leaves (not the outer most ones)

1 - Preheat oven to 400 degrees.  In a large bowl, combine beef, mushrooms, rice, garlic, ginger, scallions, soy sauce, sesame oil, and red pepper flakes.  Mix well.

2 - Core the cabbage to assist peeling the outer leaves.  Remove the first 6-8 leaves from the outside of the cabbage.

3 - Mound a large serving spoon size of the meat mixture onto the curved end of a cabbage leaf.

4- Tightly roll the leaf to create a bundle.  Place into a 9X13 baking pan seam side down.
5 - Continue to do this until all the meat mixture has been used.

6- Pour a cup of water over the rolls.  Tightly cover the dish with aluminum foil.
7- Bake for 30-35 minutes in preheated oven.
8- If desired, sprinkle with more red pepper flakes.
Enjoy!


Tuesday, April 5, 2011

What's on the Menu April 3 - 9

A little late for the blogging world, but that has just been my life recently - many other obligations that take precendence!  But having a menu in hand every week certainly helps for all my obligations to happen - somewhat stressfree!

Sunday
Leftovers from a fabulous Greek restaurant in Norfolk

Monday
Shoulder Roast with Vegetables in Crockpot
Garlic Mashed Potatoes
Salad

Tuesday
Dijon Parmesean Crusted Fish
Black Rice
Collard Greens

Wednesday
Asian Stuffed Cabbage
Carrots
Salad

Thursday
Pork and Sweet Potatoes
Collard Greens
Fruit Salad

Friday
Leftovers

Saturday
Italian Sausage and Peppers over Polenta
Salad

Monday, April 4, 2011

Turtle Swirl Cheesecake - Happy Birthday to the Big Guy!


Birthdays are a big deal at our home. Within the past week, we celebrated two - one for the Big Buy and one for our oldest son.  Big Guy enjoys cheesecake so instead of a traditional birthday cake.  So after his birthday dinner of Rock Fish stuffed with Leeks and Gorgonzola Cheese, Parmesan Cous Cous, and Salad, we topped his Turtle Swirl cheesecake with a candle and sang to him.
But don't wait for a birthday to make this easy and oh so delicious Turtle Swirl Cheesecake!  Go ahead and make it!  Turn an ordinary day into a celebration!

Turtle Swirl Cheesecake

-1 box fudge brownie mix (plus the ingredients) - make sure to use a smaller box size, the recipe calls for -19.8-21.5...I’ve found them to be too much for the cake)
-4 (8oz) packages of cream cheese (softened)
-1 ½ C granulated sugar
-5 eggs
-1 t vanilla
-3 T whipping cream (I used skim milk for less calories)
-4 oz semi-sweet chocolate chips
-1 C litehouse caramel dip (I use any caramel dip, located often in the produce section)
-½ C toasted pecans, chopped
1-Preheat oven to 350 degrees.  Spray springform pan with baking spray to prevent sticking.
2-Empty brownie mix into mixing bowl.  Add ingredients needed listed on back of box.  I substituted applesauce for the oil listed on the brownie box.  This mix is becoming the crust of the cheesecake.
3-Mix all the needed ingredients together.


4- Pour into springform pan.  You may not need all the mix.  Don't over fill the pan as you will be adding the cheesecake mixture after the brownie is baked.  The bottom of the pan needs to be covered but no more.
The excess brownie mixture I poured into a small baking dish.
5-Bake for 35 minutes.  Remove from the oven and allow to cool while cream cheese mixture is made.
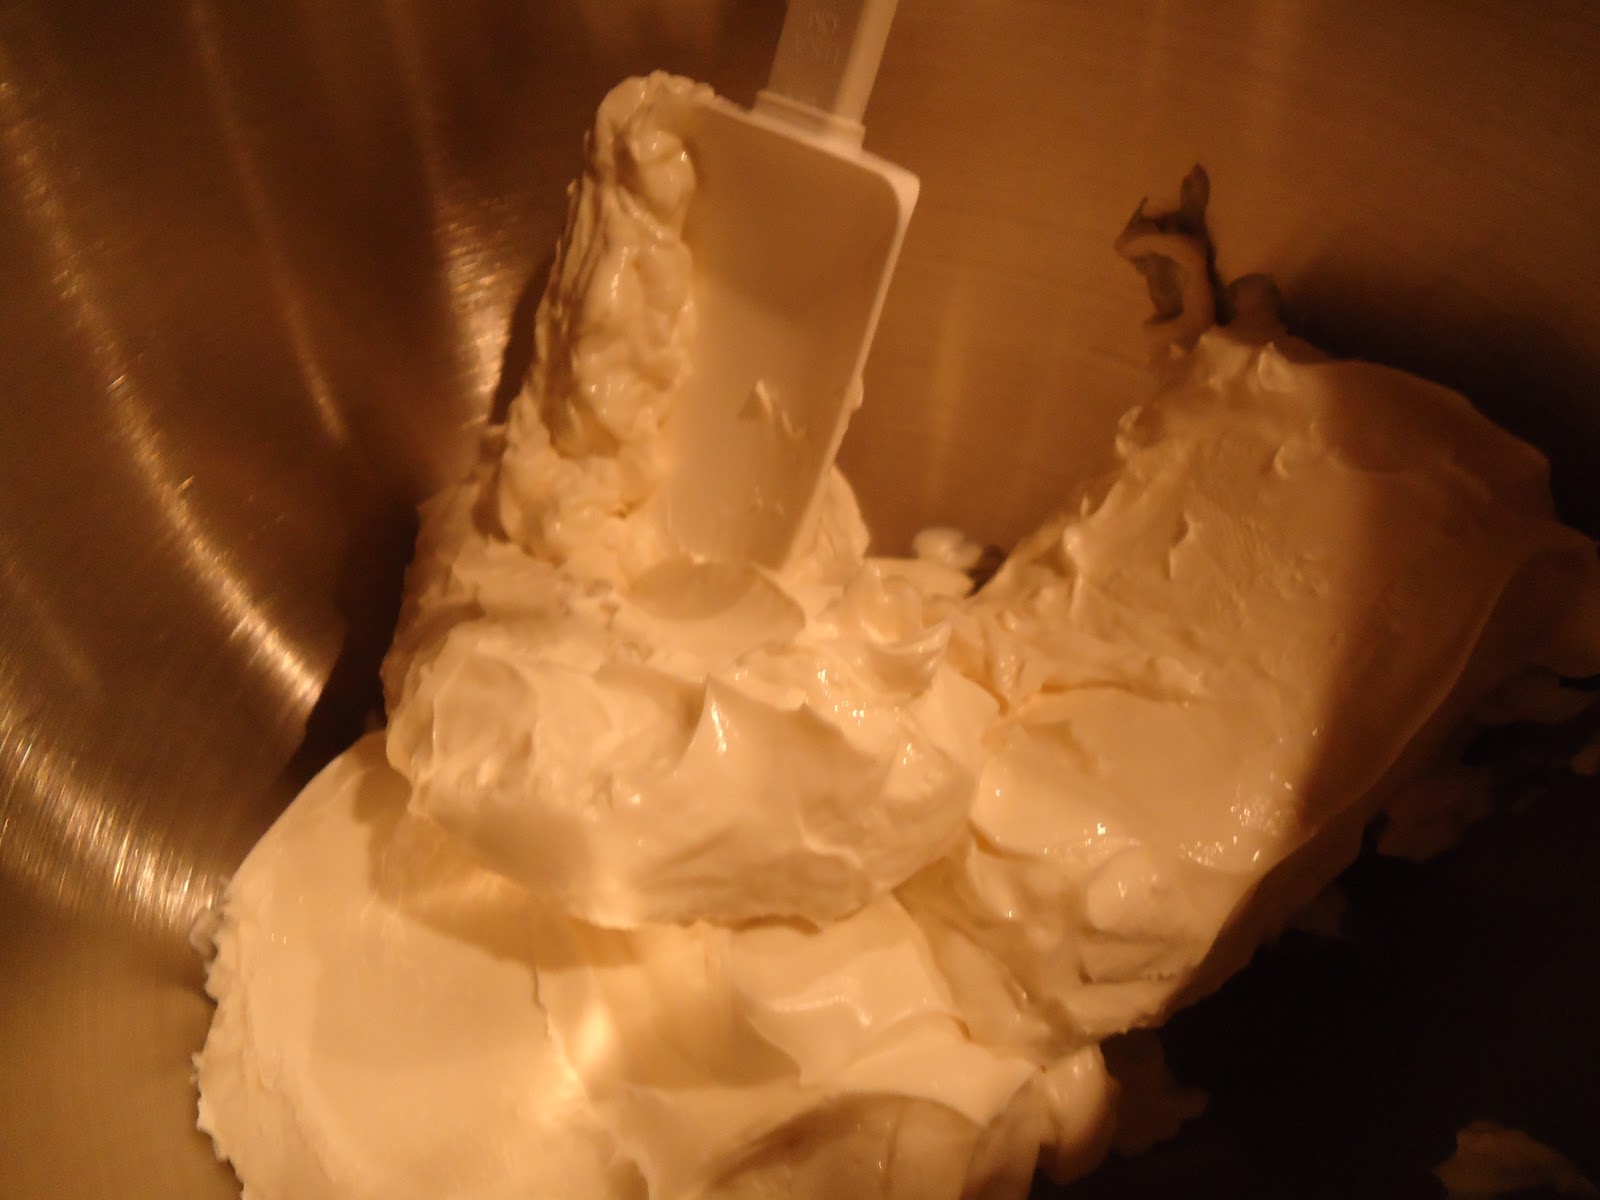
6- Beat cream cheese in mixing bowl until fluffy. Add sugar.  Beat until smooth.


7-  Add eggs, one at a  time. (see my pretty brown eggs!  We buy them from a friend who has cage free chickens.  Recently we even got a green shelled egg in one of our dozens!  So neat!)
8 - Add vanilla to cream cheese mixture.  Mix thoroughly.

9-  In a separate microwavable bowl, add chocolate chips and cream (or milk).  Microwave for 30 seconds, stir.  Heat till melted.


10-  Warm 3/4 cup of caramel in microwave 20-30 second intervals.


11 - Pour 1/2 of the cream cheese mixture over cooked brownie.  Swirl 1/2 of the melted chocolate and warmed caramel over cream cheese mixture.

12 - Take knife and make rows vertically then horizontally to create a swirl affect and lightly mix the chocolate and caramel.


13 - Pour other 1/2 of cream cheese mixture.  Top with rest of chocolate and 1/2 of the caramel.  Swirl again with knife.


14 - Take knife and make rows across then up and down.  Chocolate and caramel will follow the rows of the knife to make pretty design.  There is no right or wrong here - be creative and "knife" the rows as much as you would like.

15- Bake in preheated oven for 1 hour.  Bake in a water bath.  This is simply where you take a larger pan (such as a jelly pan or broiler pan), place cheesecake with bottom wrapped in foil, and pour about 1 1/2 inches of water.  This creates steam that helps to prevent cracks.  I failed to pay attention when the water had all evaporated thus had a few cracks.
16 - Turn oven off after an hour but leave cheesecake in oven for an additional 30 minutes.

17 - Top with remaining warmed caramel and chopped nuts.


Enjoy!